All posts by David

About David

Founder and Admin of TechGeec.com. Visit our YouTube channel at http://YouTube.com/TechGeec

freedompop

FreedomPop Review Plus Special Discount

Discount links are located at the bottom of the page

FreedomPop is a “freemium” Internet service provider; a relatively new company (publicly launched in 2012) but one with fantastic products and backed by some major league players like the people from Skype. FreedomPop offers wireless hotspot devices with free mobile data in addition to free home broadband and has recently launched America’s first free cellular smart phone service. We had the opportunity to review two of FreedomPop‘s mobile devices; the Freedom Spot Overdrive Pro (a 4G and 3G hotspot for multiple devices), and the Freedom Stick Bolt (instant internet connection from any USB port).

Freedom Stick BoltFreedom Stick Bolt

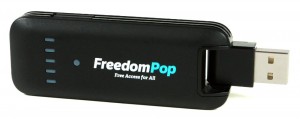
The Bolt requires no wires or charging cables. You simply plug it into any device with a USB port and instant broadband Internet access is delivered. It only takes a few seconds to connect and no WiFi hotspot is created, it’s simply plug-and-play. Typical online tasks can painlessly be done — stream HD 1080p videos from YouTube, play high quality online browser-based games with little to no lag on the highest graphics settings, and of course it works perfectly doing some simple browsing or online shopping. Speed test results were not too bad, about 4 ½ Mbps down and 1 Mbps up, however, this was only with a reception of 3 out of 5 bars. With perfect reception you can expect up to about 12Mbps down.

Overall this little USB stick is a great device. The build quality is fairly decent and it’s great that it supports virtually any device with a USB port. The LEDs are a nice touch to see your signal strength.

The only drawback is that it is a bit wide so it may be difficult to use a computer’s second USB port while using the device. Nonetheless, it is relatively the same size as other products on the market and it is extremely portable; you can easily slip it into your pocket or book bag.

Freedom Spot Overdrive Pro

Overdrive Pro

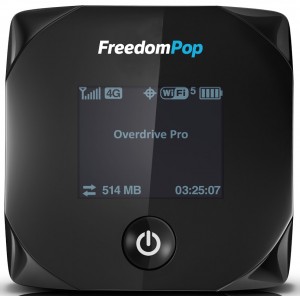
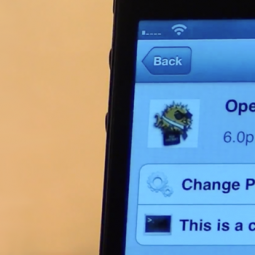
The Overdrive Pro basically creates a WiFi hotspot that allows up to 8 devices to be connected (computers, smartphones, tablets, etc.) simultaneously. One of the best features is that you can set a password to secure your network and be sure that only the people who have the password can connect and use your data. The battery lasts for about 6 or more hours and you charge it through the provided micro-USB cable and a wall charger. It is also small, about the size of a pad of sticky notes, making it incredibly easy to be on the go with. Reception was hit and miss while testing the Overdrive Pro but for the most part it worked rather well and the build quality is great.

FreedomPop Service

An important thing to keep in mind is when going through the sign up process that you pay attention to what you are signing up for so you’re not spendThe most enticing part of FreedomPop‘s service is that it is contract-free, meaning you can cancel at any time as well as renew it whenever you would like. This is what gives FreedomPop a leg up on the bigger competition such as Verizon, AT&T, and Sprint. Additionally, there are no data caps or speed-throttling and you get 500 free MB each month with any 4G-only plan. You can also get another free 500MB monthly when you refer your friends and you can get additional unlimited free data by completing offers and surveys.

Finally, the last thing to notice is that they will show that your first month’s service is free, which it is, but after that first month your credit card will be charged for the 2GB plan. The first month is a free trial of the 2GB plan so you can get a feel for the service and gauge how much data you may need, but you can always downgrade to the free 500MB 4G plan and add friends for extra data that will renew each month. In summation, you are only charged if you choose to continue on the 2GB plan and you can downgrade to the free plan at any time. Nonetheless, it is still extreing any money on extras that you do not actually need. A lot of FreedomPop‘s extras like Online Security and Data Rollover are free for the first month but will cost you a couple of dollars afterword. However, Data Rollover is an excellent and extremely affordable option to save up to 20GBs of data for when you might be traveling or away for an extended period of time.

mely cheap and contract-free compared to the big companies like Verizon and AT&T and they do tell you the price that you pay after the first month in smaller print; like anything you just have to make sure you that read the details and do not rush through the sign up.

Exclusive Discount

FreedomPop Photon Platinum Edition

Over 80% off Limited Edition Platinum Photon 4G Hotspot+ 2GB of Data + FREE Shipping- $24.99

Get over 80% off Limited Holiday Edition Platinum 4G Hotspot ($99.99) + 2GB of High Speed Internet ($17.99)+ 1Bonus GB ($10)Free Shipping. No contracts. No cancellation fees. Perfect Stocking stuffer.

Click HERE to be taken to the discount page!

raxiom smoked headlights

Raxiom Smoked Projector Headlights Review (2010-2012 Mustang)

Aesthetics

The styling of the Raxiom smoked projector headlights is phenomenal. With a black housing and smoked lens they make the front end of the Mustang look far more aggressive and stealthy. The quality is adequate for an aftermarket part.

Performance

In terms of lighting, the headlights come with stock halogen bulbs which, when coupled with the smoked lens, makes for fairly dim headlights; much dimmer than stock. Because of this I bought an HID kit separately from DDM Tuning. If you would like to do the same simply make sure that the bulbs are H9’s and 35 watts. OEM HIDs are typically 4300K, this color is the closest the pure white. The higher up you go in the Kelvin range the bluer the lights will be and the lower you go the yellower they will be.  But even with these HIDs the lights are not much brighter than the stock halogens and there is no need to worry about the housings melting so long as the bulbs are 35W. Additionally, because the bulbs are closer to the center of the car than on the stock headlights (where they were on the outside), the width of coverage is a bit less. This is noticeable when driving around a blind corner or a corner with no street lights. Lastly, the high beams do work but only the shutter of the projector opens fully, altering the beam pattern and scattering the light more; they do not get brighter.

Installation

Installation is not too difficult and little to no prior knowledge is needed. The Mustang will need to be lifted in order to remove the front bumper. Either jack stands or ramps will suffice. Without proper tools and a basic set of hand wrenches it took about 7 hours from start to finish but with the correct tools it should take about a whole afternoon. Furthermore, the lights did need to be adjusted up. From the factory the bulbs were pointed almost all the way down.

Negative(s)

The halo and accent LEDs, which add a brilliant touch of elegance and stealthiness, are only designed to turn on with the parking lights or when the headlights are on, they do not act as daytime running lights (DRLs). In order to get around this, the red power wire for the accent lights from the left headlight was connected to the red power wire from the right headlight using extra wire. This was then ran to fuse 39 in the fuse box. With this modification made, when the ignition is turned on the halos and accent LEDs turn on, just like with the OEM fog lights.

Installation Guide: v6mustangperformance.com/modifications…
Bumper Removal Guide: v6mustangperformance.com/tips…
Rewiring Guide: http://www.allfordmustangs.com/forums…
Fuse and Relay Information (PDF): http://iihs.net/fsm/?dir=710&viewfile=011%20-%20Fuse%20and%20Relay%20Information.pdf

what is jailbreaking iphone

What is Jailbreaking?

What is Jailbreaking?

The process of jailbreaking takes advantage of exploits, or imperfections, in either the software or the hardware of an iPhone, iPod touch, iPad, or Apple TV. By doing this you can remove the limitations implemented by Apple and so you can then install third-party apps, tweaks or modifications, and even themes to change the appearance of your device; all of which are not available in Apple’s App Store.

Apple applies numerous safegaurds to iOS which prevents users from installing and running software which has not been approved by them. They do this to protect the devices and users from threats like bugs, crashes, and even viruses so this method can be extremely beneficial to the run of the mill user, making iOS and easy to use and more importantly, stable operating system. While this may be good for most people, many prefer to extend the potential of their devices and make them stand out from the crowd and these two reasons are why I’ve jailbroken every single mobile Apple device that I’ve owned.

Is Jailbreaking Legal?

Many people muddy up the answer to this question and don’t provide a straightforward answer. To put it simply, in the United States, under the Digital Millennium Copyright Act, jailbreaking iOS devices is legal as it is in every other country with the exception of Canada. In Canada, the Copyright Act was amended in 2012 prohibiting tampering with digital locks. This is exactly what jailbreaking does and so it is illegal in Canada, however, there’s really no way for the government to  find out if you do it so you might as well take the leap and just do it. Now while it is legal pretty much everywhere, you will void your warranty with Apple so if you take your jailbroken device into an Apple store for help they’ll void your warranty. But what you can do is simply restore it iTunes and if you still have the problem you can take in to Apple and there’s no way they’ll ever know if you jailbroke your device.

How do you Jailbreak?

For the most part, jailbreaking tools are just programs that you can download for your Mac or PC. Normally they have you go through a few steps like holding down a few buttons on your device and they’ll do the rest. Other times programs will create custom IPSW files, or iPhone SoftWare, and will then require the user to restore to that custom file (which has the jailbreak bundled with it) using iTunes. But sometimes there are methods that just use Mobile Safari. So you open up Safari on your device, go to a specific website, tap a link, and it’s done. But, different methods are needed for different exploits and so some jailbreaks may be extremely easy while others may require your computer and a few minutes of your time.

Who Develops Jailbreaks?

So far jailbreaks have either been developed and released by independent developers like GeoHot and Comex, or by teams of developers and security experts like the iPhone Dev Team, Chronic Dev Team, and evad3rs.

Basically, the way jailbreaks are put together is that developers look for exploits, or holes, in the software or hardware of a device. Sometimes it could only take one exploit and sometimes it can take as many as twenty for a single jailbreak, but once they’re found it gives the developers a chance a to insert their own code into the device in order to bypass Apple’s limitations. These guys do this in their free time, which can often take months from the time Apple releases a new version of iOS or a new device, and these jailbreaks have always been completely free to download and use.

Cydia

Every jailbreak process installs another “app store” of sorts called Cydia. Originally, when jailbreaking first started, we had another app called Installer but since iOS 2 Cydia has been the big player. Like the App Store it lets you search for tweaks and themes and modifications and then install them. The difference of course is that Cydia only runs on jailbroken devices and the software that it provides you with has not been approved by Apple.

Cydia uses repos, or repositories, which host all of these tweaks, themes, and other software. They basically act as channels, allowing you to download and access the customizations. And, just like the App Store, while many packages are free there are some which cost money.

How do Jailbreaks Work?

Jailbreaks provide users with root access to iOS, allowing non-Apple approved software to be installed. This is done by exploiting flaws in the device’s software or hardware.

There are two levels of jailbreaks: tethered and untethered. A tethered jailbreak requires the device to be connected to a computer and then re-exploited with jailbreak software each time it boots in order to remain in a jailbroken state; otherwise, the device will boot as if it is not jailbroken and none of the tweaks, modifications, themes, or jailbreak apps will work. With an untethered jailbreak a user can properly reboot their device without being connected to a computer while retaining the jailbreak.

The most important concept to understand about jailbreaking is that a jailbreak does not exist for every version of iOS nor for every iOS device. For the most part there will be one major untethered jailbreak released per year with each new major update to iOS like iOS 6 or iOS 7. Apple will then release smaller updates which will fix bugs and patch the exploits which were necessary for the jailbreak. Often times the developers will release updated jailbreaks so that anyone who updates or purchases a device with the new version of iOS can jailbreak their device. But, just as often, they don’t release an updated jailbreak in hopes of preserving the exploits that they’ve found for future major jailbreaks.

ssh password

How to Change SSH Password on iPhone, iPod touch & iPad

By changing the root password from the default you are ensuring that only those who know the password can gain root access to your device. Jailbreaking leaves devices vulnerable because it allows users to access the device’s file system and changing the default password makes it much more difficult for anyone else to access all of the files stored on the device in addition to the protection against malware that uses SSH to access a device.

Changing your root SSH password on an iPhone, iPod touch, or iPad is incredibly simple. Once your device is jailbroken follow these steps:

1. Install OpenSSH
2. Install MobileTerminal
3. In MobileTerminal type ‘su root’ and press Return
4. Type ‘alpine’ for the password
5. Type ‘passwd’
6. Enter your new password and press Return
7 Enter the new password one more time for confirmation

cobra

Cobra Vedetta SLR 650G Review – Radar/Laser Detector

The Cobra Vedetta SLR 650G radar and laser detector is a great choice for the price range that it’s in. The informative 2.4-inch touch screen is a great feature that sets it apart from other radar detectors and allows the driver to better understand what the 650G is detecting and where the signal is coming from.

My favorite features of the Vedetta SLR 650G are the speed alert, speedometer, vocal audio warning, and it’s access to the AURA database wich allows it to detect if there are speed/red light cameras, speed traps, and dangerous intersections near you. While, overall, this is a great radar detector, it has two major flaws; having a glossy, reflective screen, and not being Mac compatible to activate and update the AURA database.

Being less than $300, Cobra’s Vedetta SLR 650G is great choice for a radar detector. It looks great and absolutely unique and works great as wel. I highly recommend this detector if you are looking for one that is relatively inexpensive and offers many great features.

Please be aware that radar detectors are not police detectors – most officers do not even drive with their radars and lidars on. Also, radar detectors do not give you a license to speed, they’re produced with the intention of making the driver more aware of their surroundings.

signal icon

How to Theme iOS 6 Cellular/WiFi Signal & Data Icons

Very few (current) themes modify the cellular and WiFi signal icons as well as themes that only modify these icons and I believe that this is because the names for these image files in the iOS file system have changed. Below you will find the names that your icons must have in order to be properly applied by WinterBoard on a device with a retina display. If your device does not have a retina display, simply remove ‘@2x’ from the images’ names.

Cellular Signal Icons

0 bars: WhiteOnBlackEtch_0_Bars@2x.png
1 bar: WhiteOnBlackEtch_1_Bars@2x.png
2 bars: WhiteOnBlackEtch_2_Bars@2x.png
3 bars: WhiteOnBlackEtch_3_Bars@2x.png
4 bars: WhiteOnBlackEtch_4_Bars@2x.png
5 bars: WhiteOnBlackEtch_5_Bars@2x.png

WiFi Signal Icons

0 bars: WhiteOnBlackEtch_0_WifiBars@2x.png
1 bar: WhiteOnBlackEtch_1_WifiBars@2x.png
2 bars: WhiteOnBlackEtch_2_WifiBars@2x.png
3 bars: WhiteOnBlackEtch_3_WifiBars@2x.png

Cellular Data Icons

EDGE: WhiteOnBlackEtch_DataTypeEDGE@2x.png
3G: WhiteOnBlackEtch_DataTypeUMTS@2x.png
4G/LTE: WhiteOnBlackEtch_DataTypeLTE@2x.png

Notification Center Icons

For Notification Center, all image names must start with ‘WhiteOnBlackShadow’ instead of ’WhiteOnBlackEtch’.

Additionally, these images must be placed in the ‘UIImages’ folder inside of the theme’s folder.

‘Theme Name’ → UIImages

You can download a signal icon pack which I modified to work with my Verizon iPhone 5 on iOS 6 so you can see how each icon is named. These icons were made by MacThemes’ user Karoshi.

Download: Cellular/WiFi Signal Icons

Quick Tip

With the help of WinterBoard, it’s actually extremely easy to figure out the file names of every image in iOS. In WinterBoard’s ‘Advanced’ settings, turn ‘Record UIImages’ to ON. Every image that is not themed will be saved as PNGs into /tmp/UIImages. For example, if you want to theme Phone.app’s dialer, open the Phone app to the dialer tab and those images will then be saved into the /tmp/UIImages folder. Simply SSH (or use iFile) into that folder and those images will be saved there so that you can find the images which you want to theme and use the same names for theming.

Leave us some comments of your favorite iPhone 5 or iOS 6 themes!

evasi0n

Jailbreak ALL iPhones, iPads, iPods on iOS 6.0-6.1 with evasi0n

Download evasi0n for Mac, Windows, and Linux at www.evasi0n.com

Steps:
a. Upgrade device to iOS 6.1
b. Disable passcode lock
1. Plug device into computer
2. Click ‘Jailbreak’ button in evasi0n
3. When prompted, tap evasi0n app ONCE
4. Complete! Open Cydia, select user type, and allow it to refresh.
c. You can now re-enable your passcode lock

evasi0n can jailbreak all iPhone, iPod touch, iPad, and iPad mini models running iOS 6.0, 6.0.1, 6.0.2, and 6.1. If the jailbreak process gets stuck somewhere, close evasi0n, reboot the device by holding the Home and Power buttons at the same time until it restarts, and restart the jailbreak process. evasi0n takes roughly 5 minutes to jailbreak the device. Once the jailbreak process is complete, open Cydia and allow it to refresh its sources. Once it closes, open Cydia again and in the ‘Changes’ section, update ‘evasi0n 6.x Untether’. Once you do that your device will be completely jailbroken and you can continue to install any jailbreak tweaks/apps/themes you choose.

roush

2011-2013 Mustang V6 Roush Exhaust Sound Clips & Review

The Roush axle-back exhaust system for the 3.7L 2011 Mustang V6 is in a class of it’s own. They’re some of the most affordable mufflers and add some of the most noticable differences than many other after-market axle-back exhausts. It’s agressive exhaust note makes the V6 Mustang sound what is was born to be, a true American muscle car.

The exhaust note dampened a bit after about 100 miles but it was so insignificant only the driver will notice. At idle it completely transforms the sound to that of a V8; nice and deep, loud, and bassy as well as below 2000 rpm. When the revs climb above 3000 rpm the Roushs absolutely scream and become a bit raspy while keeping a bit of a low tone in the background and then slightly deepen again around 6000 rpm. They’re quiet while coasting so one would without a doubt want to coast by any cops.

There is a significant amount of drone but definitely not the worst in the after-market exhaust market. The drone is obviously the worst at 2000 rpm and is managable around 1700 rpm. Overall it’s not really a big problem to hold a conversation with a passenger or while listening to the radio.

The mufflers and tips look great on the Stang. The large 4″ polished tips outshine the cheap stock tips on so many levels and the smaller mufflers (“cans”) are almost unoticable making for a much cleaner look. The entire look of the back end is improved because of these mufflers (or any other similar looking mufflers for that matter). Installation shouldn’t be too hard, it’s essentially loossening the stock mufflers and removing them from the hanging rubber brackets and then doing the reverse with the Roush axle-backs. However, if you can’t find a way to lift the car off the ground (or at least the rear wheels) you’ll have to take it into a shop to have them installed which can typically cost up to $100.

A major thing to note: the noise level (while obviously loud throughout the spectrum) is determined by how hard the throttle is punched. The harder the throttle goes down the louder (and higher pitched) the exhaust is. Overall these Roush axle-back exhausts are much, much louder than stock and it isn’t difficult to see why so many people end up returning them or reselling them because they think they are too loud and obnoxious. Lastly, absolutely coast by any cops. With these monsters on you’ll be attracting everyone’s attention while you accelerate only to make yourself a target… people aren’t lying when they say these things are a major head turner.

Loudness (volume): 4.5/5
Exhaust Note: 4.5/5
Fit & Finish: 5/5
Bang for your Buck: 5/5
Installation time: About 1 hour

Question:
Do you think you’ll be getting the Roush axle-backs? If not, why and which ones will you get instead?

encoder

Best Free Windows Screen Recorder – Microsoft Expression

Microsoft Expression is my personal favorite screen capture program for Windows. It may have an extra step (encoding the recording) but the final product is perfect as you’ll see in the sample recording at the end of the video. The free version is almost as good as the Pro version. The main difference is that you can only record 10 minute segments with the free version whereas with Pro, you can record for an unlimited amount of time; absolutely not worth the $199 price tag.

Encode a wide array of video file formats, stream live from webcams and camcorders or screen capture your PC. Make simple edits to video files and enhance your media with overlays and advertising. Choose encoding settings, choose from a range of player templates and publish rich media experiences

Customize your video to guarantee viewers a rich, pixel-perfect media experience. Expression Encoder allows you to add simple cuts to any clip, titles, pre-roll and post-roll advertising, captions, metadata and more. Capture computer screen activity for training or support needs.

Delivering a web-ready Silverlight experience is easy. Import QuickTime, AVI, MPEG, and other formats into Expression Encoder, leverage the latest quality and speed improvements to the VC-1 codec, choose your favorite Silverlight template, and publish directly to your web server using Expression Encoder Publishing Plug-ins.

Microsoft Expression 4 overview: http://www.microsoft.com/expression/products/Encoder4_Overview.aspx
Microsoft Expression 4 Free download: http://www.microsoft.com/en-us/download/details.aspx?id=24601

Question:
How many screen recording programs (free or paid) have you tried to use before?