Tag Archives: how to

what is jailbreaking iphone

What is Jailbreaking?

What is Jailbreaking?

The process of jailbreaking takes advantage of exploits, or imperfections, in either the software or the hardware of an iPhone, iPod touch, iPad, or Apple TV. By doing this you can remove the limitations implemented by Apple and so you can then install third-party apps, tweaks or modifications, and even themes to change the appearance of your device; all of which are not available in Apple’s App Store.

Apple applies numerous safegaurds to iOS which prevents users from installing and running software which has not been approved by them. They do this to protect the devices and users from threats like bugs, crashes, and even viruses so this method can be extremely beneficial to the run of the mill user, making iOS and easy to use and more importantly, stable operating system. While this may be good for most people, many prefer to extend the potential of their devices and make them stand out from the crowd and these two reasons are why I’ve jailbroken every single mobile Apple device that I’ve owned.

Is Jailbreaking Legal?

Many people muddy up the answer to this question and don’t provide a straightforward answer. To put it simply, in the United States, under the Digital Millennium Copyright Act, jailbreaking iOS devices is legal as it is in every other country with the exception of Canada. In Canada, the Copyright Act was amended in 2012 prohibiting tampering with digital locks. This is exactly what jailbreaking does and so it is illegal in Canada, however, there’s really no way for the government to  find out if you do it so you might as well take the leap and just do it. Now while it is legal pretty much everywhere, you will void your warranty with Apple so if you take your jailbroken device into an Apple store for help they’ll void your warranty. But what you can do is simply restore it iTunes and if you still have the problem you can take in to Apple and there’s no way they’ll ever know if you jailbroke your device.

How do you Jailbreak?

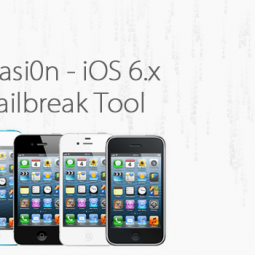
For the most part, jailbreaking tools are just programs that you can download for your Mac or PC. Normally they have you go through a few steps like holding down a few buttons on your device and they’ll do the rest. Other times programs will create custom IPSW files, or iPhone SoftWare, and will then require the user to restore to that custom file (which has the jailbreak bundled with it) using iTunes. But sometimes there are methods that just use Mobile Safari. So you open up Safari on your device, go to a specific website, tap a link, and it’s done. But, different methods are needed for different exploits and so some jailbreaks may be extremely easy while others may require your computer and a few minutes of your time.

Who Develops Jailbreaks?

So far jailbreaks have either been developed and released by independent developers like GeoHot and Comex, or by teams of developers and security experts like the iPhone Dev Team, Chronic Dev Team, and evad3rs.

Basically, the way jailbreaks are put together is that developers look for exploits, or holes, in the software or hardware of a device. Sometimes it could only take one exploit and sometimes it can take as many as twenty for a single jailbreak, but once they’re found it gives the developers a chance a to insert their own code into the device in order to bypass Apple’s limitations. These guys do this in their free time, which can often take months from the time Apple releases a new version of iOS or a new device, and these jailbreaks have always been completely free to download and use.

Cydia

Every jailbreak process installs another “app store” of sorts called Cydia. Originally, when jailbreaking first started, we had another app called Installer but since iOS 2 Cydia has been the big player. Like the App Store it lets you search for tweaks and themes and modifications and then install them. The difference of course is that Cydia only runs on jailbroken devices and the software that it provides you with has not been approved by Apple.

Cydia uses repos, or repositories, which host all of these tweaks, themes, and other software. They basically act as channels, allowing you to download and access the customizations. And, just like the App Store, while many packages are free there are some which cost money.

How do Jailbreaks Work?

Jailbreaks provide users with root access to iOS, allowing non-Apple approved software to be installed. This is done by exploiting flaws in the device’s software or hardware.

There are two levels of jailbreaks: tethered and untethered. A tethered jailbreak requires the device to be connected to a computer and then re-exploited with jailbreak software each time it boots in order to remain in a jailbroken state; otherwise, the device will boot as if it is not jailbroken and none of the tweaks, modifications, themes, or jailbreak apps will work. With an untethered jailbreak a user can properly reboot their device without being connected to a computer while retaining the jailbreak.

The most important concept to understand about jailbreaking is that a jailbreak does not exist for every version of iOS nor for every iOS device. For the most part there will be one major untethered jailbreak released per year with each new major update to iOS like iOS 6 or iOS 7. Apple will then release smaller updates which will fix bugs and patch the exploits which were necessary for the jailbreak. Often times the developers will release updated jailbreaks so that anyone who updates or purchases a device with the new version of iOS can jailbreak their device. But, just as often, they don’t release an updated jailbreak in hopes of preserving the exploits that they’ve found for future major jailbreaks.

signal icon

How to Theme iOS 6 Cellular/WiFi Signal & Data Icons

Very few (current) themes modify the cellular and WiFi signal icons as well as themes that only modify these icons and I believe that this is because the names for these image files in the iOS file system have changed. Below you will find the names that your icons must have in order to be properly applied by WinterBoard on a device with a retina display. If your device does not have a retina display, simply remove ‘@2x’ from the images’ names.

Cellular Signal Icons

0 bars: WhiteOnBlackEtch_0_Bars@2x.png
1 bar: WhiteOnBlackEtch_1_Bars@2x.png
2 bars: WhiteOnBlackEtch_2_Bars@2x.png
3 bars: WhiteOnBlackEtch_3_Bars@2x.png
4 bars: WhiteOnBlackEtch_4_Bars@2x.png
5 bars: WhiteOnBlackEtch_5_Bars@2x.png

WiFi Signal Icons

0 bars: WhiteOnBlackEtch_0_WifiBars@2x.png
1 bar: WhiteOnBlackEtch_1_WifiBars@2x.png
2 bars: WhiteOnBlackEtch_2_WifiBars@2x.png
3 bars: WhiteOnBlackEtch_3_WifiBars@2x.png

Cellular Data Icons

EDGE: WhiteOnBlackEtch_DataTypeEDGE@2x.png
3G: WhiteOnBlackEtch_DataTypeUMTS@2x.png
4G/LTE: WhiteOnBlackEtch_DataTypeLTE@2x.png

Notification Center Icons

For Notification Center, all image names must start with ‘WhiteOnBlackShadow’ instead of ’WhiteOnBlackEtch’.

Additionally, these images must be placed in the ‘UIImages’ folder inside of the theme’s folder.

‘Theme Name’ → UIImages

You can download a signal icon pack which I modified to work with my Verizon iPhone 5 on iOS 6 so you can see how each icon is named. These icons were made by MacThemes’ user Karoshi.

Download: Cellular/WiFi Signal Icons

Quick Tip

With the help of WinterBoard, it’s actually extremely easy to figure out the file names of every image in iOS. In WinterBoard’s ‘Advanced’ settings, turn ‘Record UIImages’ to ON. Every image that is not themed will be saved as PNGs into /tmp/UIImages. For example, if you want to theme Phone.app’s dialer, open the Phone app to the dialer tab and those images will then be saved into the /tmp/UIImages folder. Simply SSH (or use iFile) into that folder and those images will be saved there so that you can find the images which you want to theme and use the same names for theming.

Leave us some comments of your favorite iPhone 5 or iOS 6 themes!

troubleshoot

Learning How to Troubleshoot the Right Way

Playing around with a bunch of wires and fidgeting with the gadgets on the keyboard can not only be unproductive, but it can also be dangerous. When you want to know how to fix problems with your computer properly, what steps can you take?

Ask a Friend

Chances are, you know someone who graduated with a degree in Computer Science or who is working at a major computer store. Instead of fiddling around with the keyboard today, give that person a call. Find out when he or she is available, and ask this individual if a private tutoring session could be arranged. Let your friend know you want to learn how to deal with common troubleshooting issues when they arise, and, hopefully, this person will be happy to teach you.

Take a Course

Many people do receive their degrees in Computer Science and other related fields. As a result, most colleges, if not all, in your area will offer at least a handful of courses related to the subject matter. Over the summer or during a season when work is a little bit slow, enroll in one of these courses. You’re likely rather worried about the price. Fortunately, many community colleges also offer classes, and you can enroll in these for a fraction of the cost of what other universities would offer.

Read the Books

Whenever you purchase a new computer or a gadget for your computer, you are given a pamphlet. In this booklet, you’ll find an array of information about the device as well as details on how to deal with common troubleshooting issues when they arise. Generally, people tend to cram this booklet up into a drawer someone and completely forget where they put it in their times of needs. Make a nice little file of all of the booklets, and refer to them when your computer isn’t functioning properly. It’s quite likely you will find the answer for which you are looking in one of the chapters.

Using the Computer

Sometimes, the computer is not entirely beyond repair. For example, you might be able to turn it on, but, once you do, one of the programs you need for work will not function properly. Many computers have troubleshooting functions built right into them. As long as you are able to use the computer, look up steps on it to help you resolve the problem in a timely fashion. Sometimes, these tools can also check for problems on the system. Therefore, you will be able to find the root of the problem to address that as opposed to waffling around with issues that are not really problems at all.

The best way to learn how to troubleshoot on a computer is to have a professional or someone who works in the industry show you. If you have any questions, you can ask that person. However, when you cannot take a class or no one is available, other options exist to help you deal with the computer crisis.


This article was submitted through TechGeec’s article submission form.

Walter O’Neal writes about technology, education and more. Most recently, he has written a series of pieces on the best computer degrees.

evasi0n

Jailbreak ALL iPhones, iPads, iPods on iOS 6.0-6.1 with evasi0n

Download evasi0n for Mac, Windows, and Linux at www.evasi0n.com

Steps:
a. Upgrade device to iOS 6.1
b. Disable passcode lock
1. Plug device into computer
2. Click ‘Jailbreak’ button in evasi0n
3. When prompted, tap evasi0n app ONCE
4. Complete! Open Cydia, select user type, and allow it to refresh.
c. You can now re-enable your passcode lock

evasi0n can jailbreak all iPhone, iPod touch, iPad, and iPad mini models running iOS 6.0, 6.0.1, 6.0.2, and 6.1. If the jailbreak process gets stuck somewhere, close evasi0n, reboot the device by holding the Home and Power buttons at the same time until it restarts, and restart the jailbreak process. evasi0n takes roughly 5 minutes to jailbreak the device. Once the jailbreak process is complete, open Cydia and allow it to refresh its sources. Once it closes, open Cydia again and in the ‘Changes’ section, update ‘evasi0n 6.x Untether’. Once you do that your device will be completely jailbroken and you can continue to install any jailbreak tweaks/apps/themes you choose.

google voice banner

How to Set Up Custom Voicemail for Your Android Contacts

When somebody misses your call, you’re usually redirected to their voicemail inbox. You hear a generic greeting, a beep, and then you leave a message.

But that’s boring. Why settle for the same old generic voicemail messages when you can assign custom voicemail messages to your favorite contacts?

Thanks to Android, assigning customized voicemail greetings has never been easier. Today, we’re going to show you how to give every one of your contacts a unique voicemail message using Google Voice.

Step 1) Download Google Voice

Google Voice is a free app that is available in the Google Play store. Download and install Google Voice here. Unfortunately, the Google Voice app is currently only available to Android users in the United States.

Step 2) Enable call screening

Google Voice has a useful call screening function. You’ll need to enable this function before you record your custom voicemail greetings.

To do this, open Google Voice and select the gear icon in the top right corner. Tap on the Voice settings link and then navigate to the Calls tab.

Find the radio button beside Call Screening that says ‘On’ and select it. Once you hit Save Changes, call screening will be enabled. Call screening allows you to send callers directly to voicemail, listen to the voicemail message they’re about to leave, accept the call, or accept and record the call.

Step 3) Set up Google Voice voicemail

Now that you’ve enabled call screening, you can set up Google Voice’s voicemail. Open Google Voice and click the gear icon in the top right corner of the main menu. Choose Voice settings from the list and then select the Voicemail & SMS tab.

Once you’re ready to record your voicemail message, select Record New and speak your name into your phone. Then, choose the Android phone that you want your calls to be forwarded to and hit Connect.

Google Voice will call the Android phone you selected and then ask you to record the name you want your contacts to hear when they call you.

Step 4) Set up customized voicemail greetings

Now that you have connected Google Voice’s voicemail, it’s time to record customized greetings for your favorite contacts. To do this, once again click on the gear icon in the top right corner of the page, navigate to Voice settings and choose the Voicemail & SMS tab.

Look for the Voicemail Greeting section and then click on the Add button to add a new contact. Type in whatever name you want to use for that customized voicemail greeting.

After you press OK, a new window called Record Greeting will appear. Open the drop-down menu called Phone to ring and then select your Android phone. Click Connect and Google Voice will immediately call your phone.

When you pick up the call, Google Voice will tell you to record your customized voicemail message. Once you’ve hung up the call, select your voicemail message from the Voicemail Greeting section of the Voicemail & SMS tab, which can be found under your settings menu (click on the gear icon in the top-right of Google Voice).

Step 5) Choose your contact

Go to Google Voice and look through your list of contacts. Select the contact for which you have already recorded a personalized greeting and then select Edit Google Voice settings. Choose the Voice message that you have already recorded from the dropdown list that pops up. You can also set up a personalized voicemail message for a group using this method.

You’re done!

This feature is useful for plenty of different reasons. You can set up a customized Google Voice message for your work contacts, for example, that says you’re currently out of the office. And your friends can hear another message entirely.

Whether you want to leave a cute greeting for your girlfriend or an “I’m safe, mom” message for your parents, Google Voice can help you get the most out of your Android smartphone. Thanks to the power of Android and Google Voice, generic voicemail messages are a thing of the past.


This article was submitted through TechGeec’s article submission form.

Andrew’s website, OneClickRoot.com, offers One Click Root, the smartest android rooting software available. Just one click and you can unlock your android smartphone, or android tablet, and harness its full potential.

encoder

Best Free Windows Screen Recorder – Microsoft Expression

Microsoft Expression is my personal favorite screen capture program for Windows. It may have an extra step (encoding the recording) but the final product is perfect as you’ll see in the sample recording at the end of the video. The free version is almost as good as the Pro version. The main difference is that you can only record 10 minute segments with the free version whereas with Pro, you can record for an unlimited amount of time; absolutely not worth the $199 price tag.

Encode a wide array of video file formats, stream live from webcams and camcorders or screen capture your PC. Make simple edits to video files and enhance your media with overlays and advertising. Choose encoding settings, choose from a range of player templates and publish rich media experiences

Customize your video to guarantee viewers a rich, pixel-perfect media experience. Expression Encoder allows you to add simple cuts to any clip, titles, pre-roll and post-roll advertising, captions, metadata and more. Capture computer screen activity for training or support needs.

Delivering a web-ready Silverlight experience is easy. Import QuickTime, AVI, MPEG, and other formats into Expression Encoder, leverage the latest quality and speed improvements to the VC-1 codec, choose your favorite Silverlight template, and publish directly to your web server using Expression Encoder Publishing Plug-ins.

Microsoft Expression 4 overview: http://www.microsoft.com/expression/products/Encoder4_Overview.aspx
Microsoft Expression 4 Free download: http://www.microsoft.com/en-us/download/details.aspx?id=24601

Question:
How many screen recording programs (free or paid) have you tried to use before?

jailbreak backup

How to Backup Jailbreak Apps, Tweaks, Data

Backing up jailbreak data has always been an issue for those of us who have jailbroken iPhones, iPod touches, or iPads. Luckily there are a few ways to backup this data and have it easily restored the next time you have to re-jailbreak your device.

AptBackup [FREE] – This app is extremely simple and minimal. You tap a button that says “Backup” your data is automatically stored in a list. When you want to restore that data you tap the “Restore” button and it will re-download all of the jailbroken packages that you had before. The problem with this app, however, is that you must restore from a backup which means you won’t be able to have a fresh, clean, new iOS version. You’ll always have your left over junk data which bogs down your device. I have had issues with this app in the past not re-installing jailbreak data which is one of the reasons I no longer use it.

xBackup [$1.50] – This app is very similar to AptBackup in that it is very simple and minimal. The difference, though, is that xBackup will backup your data list to their servers so that you can do a clean restore on your device and start fresh.

PKGBackup [$9.99] – PKGBackup is my personal favorite as it provides many unique and useful features. The price is relatively high for a jailbreak app but given it’s usefulness it is well worth it. You can send your backups to Dropbox or any other cloud storage and you can schedule backups. Many other features are present and are shown in the video.

All three of these apps are available on default repositories so there is no need to add any sources.

Question: Have you used any of these apps before. If you have, which one, and if not, which one will you be trying?

revo uninstaller

Completely Uninstall Programs on Windows

Revo Uninstaller, developed by VS Revo Group, is a tool that allows you to completely uninstall a program from Windows. Often when uninstalling programs through the typical uninstaller, many registry files and directories are left behind. Over time these left over and useless files bog down your computer. By using a tool like Revo Uninstaller, it will uninstall the program like normal and then scan the computer for any additional files that were not removed. It allows you to select which files to keep and which to delete.

You can purchase the full version of Revo Uninstaller but I recommend just downloading the free version. It will still scan for leftovers after the standard uninstall, it includes eight additional cleaning tools, and free tech support is also included. There’s some nice features that come packed with the Pro version but nothing that I feel is worth the $20 – $40 price tag.

You can download Revo Uninstaller by clicking HERE.

iPhone Home Button

How to Recalibrate (Refresh) iPhone, iPod touch, or iPad Home Button

After an iPhone, iPod touch, or iPad has been used for some time, the home button may begin to seem unresponsive or slow. While this may be due to a hardware issue (the device may have been dropped, damaging internal hardware), it’s worth a shot to recalibrate the device’s home button.

To recalibrate the home button, follow these steps:

1. Open a pre-installed app (e.g., Stocks, Calendar, Weather, Calendar, etc.).
2. Hold down the power button until the “Slide to Power Off” option appears.
3. Hold down the home button until the application quits.

This may or may not solve your home button’s issue(s) but there is no harm in trying. If you try this tip make sure to leave us a comment telling us whether or not it made a difference for you.