Tag Archives: fix

troubleshoot

Learning How to Troubleshoot the Right Way

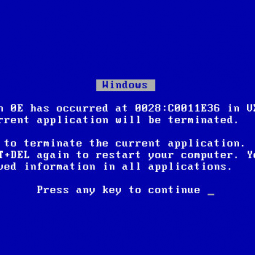
Playing around with a bunch of wires and fidgeting with the gadgets on the keyboard can not only be unproductive, but it can also be dangerous. When you want to know how to fix problems with your computer properly, what steps can you take?

Ask a Friend

Chances are, you know someone who graduated with a degree in Computer Science or who is working at a major computer store. Instead of fiddling around with the keyboard today, give that person a call. Find out when he or she is available, and ask this individual if a private tutoring session could be arranged. Let your friend know you want to learn how to deal with common troubleshooting issues when they arise, and, hopefully, this person will be happy to teach you.

Take a Course

Many people do receive their degrees in Computer Science and other related fields. As a result, most colleges, if not all, in your area will offer at least a handful of courses related to the subject matter. Over the summer or during a season when work is a little bit slow, enroll in one of these courses. You’re likely rather worried about the price. Fortunately, many community colleges also offer classes, and you can enroll in these for a fraction of the cost of what other universities would offer.

Read the Books

Whenever you purchase a new computer or a gadget for your computer, you are given a pamphlet. In this booklet, you’ll find an array of information about the device as well as details on how to deal with common troubleshooting issues when they arise. Generally, people tend to cram this booklet up into a drawer someone and completely forget where they put it in their times of needs. Make a nice little file of all of the booklets, and refer to them when your computer isn’t functioning properly. It’s quite likely you will find the answer for which you are looking in one of the chapters.

Using the Computer

Sometimes, the computer is not entirely beyond repair. For example, you might be able to turn it on, but, once you do, one of the programs you need for work will not function properly. Many computers have troubleshooting functions built right into them. As long as you are able to use the computer, look up steps on it to help you resolve the problem in a timely fashion. Sometimes, these tools can also check for problems on the system. Therefore, you will be able to find the root of the problem to address that as opposed to waffling around with issues that are not really problems at all.

The best way to learn how to troubleshoot on a computer is to have a professional or someone who works in the industry show you. If you have any questions, you can ask that person. However, when you cannot take a class or no one is available, other options exist to help you deal with the computer crisis.


This article was submitted through TechGeec’s article submission form.

Walter O’Neal writes about technology, education and more. Most recently, he has written a series of pieces on the best computer degrees.

Sony Vegas Render Error Low Memory

FIX Sony Vegas Low Memory Error on Render

The Sony Vegas rendering suite is incredibly popular among amateurs and professionals alike. However, it is notorious for providing the user with rendering errors. The most well-known being, “The system is low on memory. You may be able to reduce memory usage by closing other applications.”

On a 64-bit machine, this is due to the fact that all editions of Vegas below Professional do not support more than 2GB of memory (i.e., they are 32-bit applications, not 64-bit). To solve this issue, download a free program, 4GB Patch, developed by NTCore, and browse for the Sony Vegas executable file. Typically this file will be stored in:

C:\Program Files (x86)\Sony\Vegas Movie Studio HD Platinum 10.0

The last folder will be named whatever version of Sony Vegas you have installed and the file that you will need to select will have the Sony Vegas icon.

Once you select the application, 4GB Patch will make the necessary changes and Vegas will then be capable of accessing up to 4GB of memory.

This program will also work with any other program you have that may be giving you similar errors. If you decide to try 4GB Patch be sure to leave a comment a let us know how it worked out on your end.

iPhone Home Button

How to Recalibrate (Refresh) iPhone, iPod touch, or iPad Home Button

After an iPhone, iPod touch, or iPad has been used for some time, the home button may begin to seem unresponsive or slow. While this may be due to a hardware issue (the device may have been dropped, damaging internal hardware), it’s worth a shot to recalibrate the device’s home button.

To recalibrate the home button, follow these steps:

1. Open a pre-installed app (e.g., Stocks, Calendar, Weather, Calendar, etc.).
2. Hold down the power button until the “Slide to Power Off” option appears.
3. Hold down the home button until the application quits.

This may or may not solve your home button’s issue(s) but there is no harm in trying. If you try this tip make sure to leave us a comment telling us whether or not it made a difference for you.

ProSwitcher, Multifl0w, & Circuitous Alternative for iOS 4 (ALL DEVICES)

Video tutorial below.

As we all know, Apple decided to come out with their own version of multitasking in iOS4. The problem is that it’s not “true” multitasking. In this tutorial, I will explain how to use Apple’s multitasking bar with Backgrounder. This disables Apple’s multitasking and replaces it with Backgrounder’s multitasking.

This is great for older iDevices with 128MB RAM (iPod touch 1G, iPod touch 2G, iPhone 2G, iPhone 3G) because they don’t support Apple’s multitasking but it will still work perfectly using this method.


Steps:

1. Open Cydia and download Backgrounder
2. Open Backgrounder and go to Global. Make sure “Backgrounder” is checked as ‘Backgrounding Method’ and “Fall Back to Native” is TURNED OFF

3. SSH into the directory: /System/Library/CoreServices/SpringBoard.app
4. Locate the N72AP.plist (or N82AP.plist)
5. Backup the .plist file. Edit your .plist in any text editing software and add the following key after <dict> and before </dict>:

<key>multitasking</key>
<true/>

6. Copy the newly edited .plist file back to the directory on your iDevice (OR save it if you edited it straight from your SSH client) and REBOOT.
7. Open Cydia and download a package, “Remove Recents”.
8. Respring (or reboot if you don’t know how to respring).

How to SSH on Windows
How to SSH on Mac

Fix PDF Security Holes Without Updating to iOS 4.0.2/3.2.2

iOS 4.0.2 for iPhone/iPod touch and iOS 3.2.2 for iPad was released yesterday, fixing the security hole that @comex exploited in order to revive JailbreakMe.com. However, for whatever the reason may be, iPhone neglected to release the new firmware for the iPhone 2G and iPod touch 1G. If you’re an owner of either of those two devices, you can easily patch the security hole with Saurik‘s (creator of Cydia) new patch via Cydia (you must be jailbroken). You can also install this patch on all other iDevices (and on all other firmwares from 2.x on up) if you choose not to update to the new firmware and lose your jailbreak.

To install Saurik’s patch, open Cydia and search for the package named ‘PDF Patch’.

Apple Releases iOS 4.0.2 for iPhone/iPod touch and iOS 3.2.2 for iPad

All this fixes is the PDF Exploit and nothing else. So if you require a jailbreak or unlock do not upgrade. I read the terms and that is all that is in the new update. It is available for All iDevices.

It might have taken some time, but Apple just got around to finally pushing out a new version of iOS that fixes the recently revealed exploit that allowed the jailbreakme.com jailbreak.

That’s all it really does, so there isn’t much to be excited about. It comes in two flavors: 4.0.2 for the iPhone and 3.2.2 for the iPad. Should you install it? Well, it’s hard to say. On one hand, it will kill your ability to jailbreak, at least for the time being. Which is unfortunate. On the other hand, it fixes an important security hole that could be exploited by some hackers to do who-knows-what to your iDevice. The decision is yours.

How to Jailbreak 3.0.1 Firmware

Courtesy of  QuickPWN.com:

The iPhone 3.0.1 update was recently released. If you want to jailbreak any iPhone running on  iPhone OS 3.0.1, you must use redsn0w 0.8. Do not update to 3.0.1 if you are using an iPod Touch, there is no need to. This post will show a step-by-step tutorial on how to jailbreak iPhone 3.0.1 with redsn0w.

Note:

  1. redsn0w only recognizes iPhone 3.0 firmware (not 3.0.1 yet!), although you are running firmware 3.0.1 you must still download iPhone OS 3.0 firmware for your device.
  2. The recent iPhone 3.0.1 update does not fix the iPhone 3GS hole, so it’s safe for iPhone 3GS users to update. If you downloaded a purplera1nday file or your iBec or iBSS for iPhone 3GS you don’t need to redownload it because it’s identical in this update.

First you must download redsn0w for Windows, Mac, or Linux from here.

redsn0w 0.8 works for Phone 3.0.1, iPhone 3G 3.0.1, iPhone 3GS 3.0.1, iPod Touch 3.0, and iPod Touch 2G 3.0.

1. Download the iPhone OS 3.0 IPSW file for your device and save it to your desktop. Here are the file names for each device, make sure you have the right one:

  • iPhone 2G – filename: iPhone1,1_3.0_7A341_Restore.ipsw [download link]
  • iPhone 3G – filename: iPhone1,2_3.0_7A341_Restore.ipsw [download link]
  • iPhone 3GS – filename: iPhone2,1_3.0_7A341_Restore.ipsw [download link]

2. Open the redsn0w 0.8 application to jailbreak iPhone 3.0.1.

3. Click the Browse button.

redsn0w browse

4. Locate your device’s IPSW file that you downloaded in step 1 and click Open.

Browse for IPSW

5. The redsn0w window will have the “IPSW successfully identified” message. Click the Next button to continue.

IPSW Successfully Identified

6. redsn0w will ask you to “Please select which options you would like to have“. Make sure the Install Cydia box has a check mark and then click Next.

redsn0w select options

7. redsn0w will ask you to make sure your device is both OFF and PLUGGED IN to your computer. Make sure you plug in your device in to your computer and then turn it off. Click Next once you have done this.

redsn0w - Make sure your devices is OFF and PLUGGED IN

8. redsn0w will now ask you to connect your device in DFU mode, you must do this properly to jailbreak iPhone 3.0.1.

  1. Hold down the Power button for 3 seconds
  2. Without releasing the Power button, also hold down the Home (bottom center button) for 10 seconds
  3. Without releasing the Home button, release the Power button BUT KEEP holding the Home button for 30 seconds
  • If you don’t do this properly you will get a DFU Mode Failed message and you’ll have to go back to step one.

redsn0w DFU Mode

9. Once your device has successfully entered DFU Mode, redsn0w will show the following message: “Please wait while your device is being jailbroken. Waiting for reboot.” Your device should reboot after this. If redsn0w is stuck on Waiting to Reboot, unplug your USB cable quickly and plug it back in. The jailbreaking process should continue after tha.

10. Once your device has rebooted redsn0w will start uploading the RAMDisk and kernel.

11. After everything has been successfully uploaded to your device, redsn0w will have; the “Done!” message. Your device will now reboot and you should see the Cydia app on your SpringBoard. Your iPhone is now jailbroken!

Apple Releases 3.0.1 Update to Fix SMS Security Flaw

Yesterday, Apple released the 3.0.1 firmware update for iPhones and iPod Touches. It is advised that if you’re on an iPod Touch do not update considering the only difference is the SMS vulnerability fix. If you’re on an iPhone and are worried about your security, you should update. If not, don’t worry about it.firmware3.0.1