Tag Archives: unlock

Jailbreakers – Stay Away from iOS 4.1

As many of you probably know, today Apple released a new firmware for the iPhone and iPod touch, iOS 4.1. If you are currently jailbroken and would like to keep your jailbreak, do not update! There is currently two known ways to jailbreak this firmware, one way would be through redsn0w, another and much more simplistic way, is through an updated version of jailbreakme.com. Right now we’re just waiting on Comex, creator of jailbreakme, to release the jailbreak(s). Here’s the newest post from the iPhone Dev-Team regarding iOS 4.1:

Quote (via iPhone Dev-Team):

This time of year there are lots of new iPhone owners, and not everybody knows that accepting new iOS updates is the surest way to lose your jailbreak and/or unlock.  While those of you who have Cydia or TinyUmbrella backups of your FW hashes will always be able to get back to 4.0.1 if you make this mistake, this doesn’t hold for unlockers. There’s currently no known way to revert your baseband — if you update your baseband you’ll lose the ultrasn0w unlock, possible forever.

Please stay away from this 4.1 release until a safe jailbreak procedure (which also preserves ultrasn0w) is developed and released.

P.S.  There are a tiny number of iPhone3G owners who can revert their basebands due to a flaw in very early bootloaders…you will already know if you fit in this category!
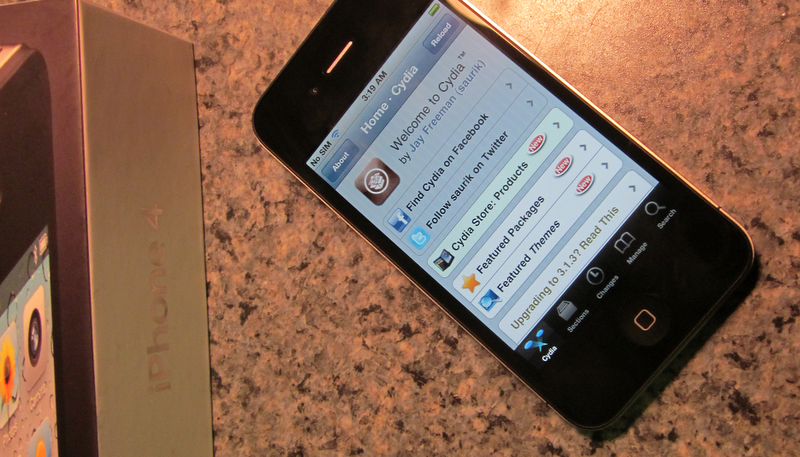
How to Unlock the iPhone 4 for Use with Other Carriers (T-Mobile)

Unlocking an iPhone allows one to use it with an unsupported wireless carrier, for example, T-Mobile, in the U.S. The iPhone Dev-Team has released an unlock for the iPhone 4 using the baseband 01.59. If you don’t know what baseband your iPhone is currently on, you can use a program by iH8sn0w, called f0recast for both Mac and PC. You can download it HERE.

This unlock is incredibly simple and fast. Here’s the steps:

1. Jailbreak your iPhone 4: http://www.youtube.com/watch?v=Cqy0sPoN8Z8
2. Open Cydia>Manage>Sources>Edit>Add
3. Add the source: http://repo666.ultrasn0w.com
4. Remove SIM card if haven’t already
5. Search for and install ultrasn0w
6. Reboot iPhone

If no signal is found, go to Settings and turn on Airplane Mode, then turn it off. If you still have no signal, reboot the iPhone. That’s it! Your iPhone 4 should now be successfully unlocked and using either T-Mobile or another unsupported carrier! Follow @TechGeec on Twitter for updates.

iPhone 4 Jailbreak: Coming Soon

Today, July 10, 2010, George Hotz (aka Geohot) released a blog post with proof that he has jailbroken the iPhone 4 with a program he’s made called limera1n. Currently, there has been no ETA. Here’s a picture for proof:

How to Jailbreak the iPad (WiFi + WiFi/3G)

You can now jailbreak your iPad using comex’s Spirit tool. This guide will show you how. This is for OS X but the Windows version works exactly the same. It is a universal release, so both PPC and Intel folks (using Macs) are supported.

Jailbreak the iPad

First off, download Spirit. OS X users can download it from SpiritJB.com, ModMyi.com, or the MediaFire.com miror.
Windows users can get it here, from SpritJB.com, as well.

You’ll see the Spirit icon on your desktop.

Make sure your iPad is on, in normal mode, and connected to the computer via your USB cable. Open Spirit – it will see your device and show it’s ready (Spirit works on any iPad, iPhone, or iPod touch on firmware 3.1.2, 3.1.3, or 3.2).

Jailbreak iPad

Press Jailbreak. For about 30 seconds you’ll see Spirit tell you it’s jailbreaking.

Your iPad (or other device) will show a “Restore Complete” screen (don’t worry, it’s not deleting any of your info/content), and Spirit will show Jailbreak Complete!

Jailbreak iPad

The iPad will restart, and for a minute or two you will see a very nice piece of artwork while Spirit is extracting the bootstrap package and finishing its work.

Boom – that’s it. Your iPad will then start back up, and you’ll see Cydia installed.

I strongly suggest if you have not already backed up your SHSH blobs, you open Cydia and press the Make my life easier, thanks! button to have saurik’s server back them up for you. This ensures you can always restore to the 3.2 firmware, regardless of whether Apple attempts to restrict that later.

Congratulations! You’re now the proud owner of a jailbroken iPad.

Redsn0w 0.9 Released for Mac and Windows

Well the iPhone Dev-Team has unofically released redsn0w 0.9 beta3. The reason why they haven’t offically announced it on their blog, is because it is still currently in the beta stages.

Quote (via redsn0w 0.9beta3):

What is it?

A cross-platform jailbreaking, unlocking, and customizing tool for iPhones and iPod touches. Customizations include boot logos, recovery logos, and “verbose” boot. It’s a standalone program that doesn’t use iTunes (no custom IPSWs are involved).

The download links are at the bottom of this page (but please read the whole page anyway!).

We’ve been offering redsn0w in various incarnations over the years (including poorlad’s Windows version of QuickPwn). The most recent release before this one was redsn0w 0.8, which targeted Apple firmware 3.0/3.0.1.

What devices, platforms, and FW versions are supported?

The beta supports:

  • All iPhones and iPod touches except the iPod touch 3G
  • Windows and Mac OSX (x86)
  • Apple firmware 3.0 and 3.1.2

When it’s out of beta, it will support the iPod touch 3G, PPC OSX, and Linux.

If you need a carrier unlock, redsn0w will handle iPhone 2G by itself (by installing our BootNeuter utility). For the 3G and 3GS, use Cydia after you’re jailbroken to install ultrasn0w (baseband 04.26, preferred) or blacksn0w (baseband 05.11).

How is it different from PwnageTool?

redsn0w doesn’t require a system restore like PwnageTool does (it doesn’t even use iTunes at all). On the other hand, PwnageTool can prevent your baseband from being upgraded when you upgrade your firmware, preserving your unlock. (redsn0w doesn’t touch your baseband but it doesn’t help preserve it during an upgrade either).

redsn0w works by modifying your current filesystem, so your existing baseband, data and applications should remain intact.

How is it different from blackra1n?

It differs from blackra1n because:

  • It uses our original Pwnage bootrom exploit for iPhone 2G, iPhone 3G, and iPod 1G. (Because it’s a bootrom exploit, it can’t be fixed by Apple without a new hardware release.) Note that redsn0w 0.9 does use the USB exploit for iPhone 3GS and iPod 2G running 3.1.2, but that exploit will be fixed in Apple’s next FW release.
  • It offers custom logos and verbose boot
  • It installs Cydia without needing a separate download
  • It’s not as fast :) (but redsn0w handles more variations :))

What if I have a late-model device?

If you have a late-model iPhone 3GS, or if you have an iPod touch 2G whose serial number begins with “MC”, you can use redsn0w to jailbreak but you are currently restricted to “tethered” rebooting. That means you need to connect your device to a computer to complete the boot after a reset. Also, these devices cannot have custom logos.

redsn0w will ask you whether or not you fit in this category when used with the iPhone 3GS or iPod touch 2G. If you have a late-model device and don’t give redsn0w the correct answer, you will likely need to do a system restore to recover from the mistake.

To do a tethered boot after your late-model device resets for some reason, either run redsn0w again and select “Just boot tethered right now”, or run blackra1n.

What if I’m already jailbroken?

If you’re already jailbroken (by whatever means), redsn0w can still be used to change your boot logos, revert back to the stock logos, or switch verbose booting on and off. By selecting “Already Pwned” you can bypass the steps normally needed to enter the jailbroken state.

How long should it take

You should see a picture of a drive (“Downloading Jailbreak Data”) within 30 seconds of launching the jailbreak (after you’ve made your custom selections). It should then reboot and you should see a running pwnapple while the process is underway. It should finish within a minute or two after that, and will reboot on its own.

Is it safe?

The Windows version has been tested by small groups of volunteers on IRC and our blog since mid-January. That being said, this is still a beta and if things go wrong you may have to do a system restore…so make sure your data and pictures are synced before trying the beta.

Beta feedback

redsn0w is in beta until we get iPod Touch 3G, PPC OSX, and Linux support added. In the meantime, please send any feedback to MuscleNerd (either gmail or iphone-dev.org), or tweet with a #redsn0w tag. Please detail your device, OS, and any problem you find.

Download links

I was able to succesfully jailbreak my second generation iPod Touch using Redsn0w 0.9 beta3 and I highly reccommend it over Sn0wbreeze as Sn0wbreeze didn’t work for me whatsoever. And my feature included in 0.9 beta3, is that it offers verbose boot. Verbose boot is a boot function that shows the processes the iDevice must go through in order to boot. So instead of displaying the regular Apple logo, it displays the current processes. Here’s what it looks like:

Have fun jailbreaking your iDevice running 3.1.2! To visit the download page, click HERE.

How to Jailbreak 3.0.1 Firmware

Courtesy of  QuickPWN.com:

The iPhone 3.0.1 update was recently released. If you want to jailbreak any iPhone running on  iPhone OS 3.0.1, you must use redsn0w 0.8. Do not update to 3.0.1 if you are using an iPod Touch, there is no need to. This post will show a step-by-step tutorial on how to jailbreak iPhone 3.0.1 with redsn0w.

Note:

  1. redsn0w only recognizes iPhone 3.0 firmware (not 3.0.1 yet!), although you are running firmware 3.0.1 you must still download iPhone OS 3.0 firmware for your device.
  2. The recent iPhone 3.0.1 update does not fix the iPhone 3GS hole, so it’s safe for iPhone 3GS users to update. If you downloaded a purplera1nday file or your iBec or iBSS for iPhone 3GS you don’t need to redownload it because it’s identical in this update.

First you must download redsn0w for Windows, Mac, or Linux from here.

redsn0w 0.8 works for Phone 3.0.1, iPhone 3G 3.0.1, iPhone 3GS 3.0.1, iPod Touch 3.0, and iPod Touch 2G 3.0.

1. Download the iPhone OS 3.0 IPSW file for your device and save it to your desktop. Here are the file names for each device, make sure you have the right one:

  • iPhone 2G – filename: iPhone1,1_3.0_7A341_Restore.ipsw [download link]
  • iPhone 3G – filename: iPhone1,2_3.0_7A341_Restore.ipsw [download link]
  • iPhone 3GS – filename: iPhone2,1_3.0_7A341_Restore.ipsw [download link]

2. Open the redsn0w 0.8 application to jailbreak iPhone 3.0.1.

3. Click the Browse button.

redsn0w browse

4. Locate your device’s IPSW file that you downloaded in step 1 and click Open.

Browse for IPSW

5. The redsn0w window will have the “IPSW successfully identified” message. Click the Next button to continue.

IPSW Successfully Identified

6. redsn0w will ask you to “Please select which options you would like to have“. Make sure the Install Cydia box has a check mark and then click Next.

redsn0w select options

7. redsn0w will ask you to make sure your device is both OFF and PLUGGED IN to your computer. Make sure you plug in your device in to your computer and then turn it off. Click Next once you have done this.

redsn0w - Make sure your devices is OFF and PLUGGED IN

8. redsn0w will now ask you to connect your device in DFU mode, you must do this properly to jailbreak iPhone 3.0.1.

  1. Hold down the Power button for 3 seconds
  2. Without releasing the Power button, also hold down the Home (bottom center button) for 10 seconds
  3. Without releasing the Home button, release the Power button BUT KEEP holding the Home button for 30 seconds
  • If you don’t do this properly you will get a DFU Mode Failed message and you’ll have to go back to step one.

redsn0w DFU Mode

9. Once your device has successfully entered DFU Mode, redsn0w will show the following message: “Please wait while your device is being jailbroken. Waiting for reboot.” Your device should reboot after this. If redsn0w is stuck on Waiting to Reboot, unplug your USB cable quickly and plug it back in. The jailbreaking process should continue after tha.

10. Once your device has rebooted redsn0w will start uploading the RAMDisk and kernel.

11. After everything has been successfully uploaded to your device, redsn0w will have; the “Done!” message. Your device will now reboot and you should see the Cydia app on your SpringBoard. Your iPhone is now jailbroken!