Tag Archives: redsn0w

ssh password

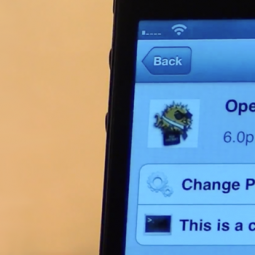
How to Change SSH Password on iPhone, iPod touch & iPad

By changing the root password from the default you are ensuring that only those who know the password can gain root access to your device. Jailbreaking leaves devices vulnerable because it allows users to access the device’s file system and changing the default password makes it much more difficult for anyone else to access all of the files stored on the device in addition to the protection against malware that uses SSH to access a device.

Changing your root SSH password on an iPhone, iPod touch, or iPad is incredibly simple. Once your device is jailbroken follow these steps:

1. Install OpenSSH
2. Install MobileTerminal
3. In MobileTerminal type ‘su root’ and press Return
4. Type ‘alpine’ for the password
5. Type ‘passwd’
6. Enter your new password and press Return
7 Enter the new password one more time for confirmation
Jailbreakers – Stay Away from iOS 4.1

As many of you probably know, today Apple released a new firmware for the iPhone and iPod touch, iOS 4.1. If you are currently jailbroken and would like to keep your jailbreak, do not update! There is currently two known ways to jailbreak this firmware, one way would be through redsn0w, another and much more simplistic way, is through an updated version of jailbreakme.com. Right now we’re just waiting on Comex, creator of jailbreakme, to release the jailbreak(s). Here’s the newest post from the iPhone Dev-Team regarding iOS 4.1:

Quote (via iPhone Dev-Team):

This time of year there are lots of new iPhone owners, and not everybody knows that accepting new iOS updates is the surest way to lose your jailbreak and/or unlock.  While those of you who have Cydia or TinyUmbrella backups of your FW hashes will always be able to get back to 4.0.1 if you make this mistake, this doesn’t hold for unlockers. There’s currently no known way to revert your baseband — if you update your baseband you’ll lose the ultrasn0w unlock, possible forever.

Please stay away from this 4.1 release until a safe jailbreak procedure (which also preserves ultrasn0w) is developed and released.

P.S.  There are a tiny number of iPhone3G owners who can revert their basebands due to a flaw in very early bootloaders…you will already know if you fit in this category!

ProSwitcher, Multifl0w, & Circuitous Alternative for iOS 4 (ALL DEVICES)

Video tutorial below.

As we all know, Apple decided to come out with their own version of multitasking in iOS4. The problem is that it’s not “true” multitasking. In this tutorial, I will explain how to use Apple’s multitasking bar with Backgrounder. This disables Apple’s multitasking and replaces it with Backgrounder’s multitasking.

This is great for older iDevices with 128MB RAM (iPod touch 1G, iPod touch 2G, iPhone 2G, iPhone 3G) because they don’t support Apple’s multitasking but it will still work perfectly using this method.


Steps:

1. Open Cydia and download Backgrounder
2. Open Backgrounder and go to Global. Make sure “Backgrounder” is checked as ‘Backgrounding Method’ and “Fall Back to Native” is TURNED OFF

3. SSH into the directory: /System/Library/CoreServices/SpringBoard.app
4. Locate the N72AP.plist (or N82AP.plist)
5. Backup the .plist file. Edit your .plist in any text editing software and add the following key after <dict> and before </dict>:

<key>multitasking</key>
<true/>

6. Copy the newly edited .plist file back to the directory on your iDevice (OR save it if you edited it straight from your SSH client) and REBOOT.
7. Open Cydia and download a package, “Remove Recents”.
8. Respring (or reboot if you don’t know how to respring).

How to SSH on Windows
How to SSH on Mac

How to Unlock the iPhone 4 for Use with Other Carriers (T-Mobile)

Unlocking an iPhone allows one to use it with an unsupported wireless carrier, for example, T-Mobile, in the U.S. The iPhone Dev-Team has released an unlock for the iPhone 4 using the baseband 01.59. If you don’t know what baseband your iPhone is currently on, you can use a program by iH8sn0w, called f0recast for both Mac and PC. You can download it HERE.

This unlock is incredibly simple and fast. Here’s the steps:

1. Jailbreak your iPhone 4: http://www.youtube.com/watch?v=Cqy0sPoN8Z8
2. Open Cydia>Manage>Sources>Edit>Add
3. Add the source: http://repo666.ultrasn0w.com
4. Remove SIM card if haven’t already
5. Search for and install ultrasn0w
6. Reboot iPhone

If no signal is found, go to Settings and turn on Airplane Mode, then turn it off. If you still have no signal, reboot the iPhone. That’s it! Your iPhone 4 should now be successfully unlocked and using either T-Mobile or another unsupported carrier! Follow @TechGeec on Twitter for updates.

iOS 4 Jailbreak: Q&A

There has been so much confusion lately on which devices can be jailbroken, what programs to use, etc. Hopefully the video below will answer your questions. If you still have questions that weren’t answered in the video, leave a comment and your question will be answered ASAP.

Jailbreak Released for iPhone 3GS (Old Bootrom)

Quote (via iPhone Dev-Team Blog)

PwnageTool 4.0 Release Info

On Monday, Apple released firmware 4.0 for the iPhone and iPod touch devices.  This of course was a major upgrade.

As advised, you shouldn’t have upgraded your devices if you have previously relied on our tools for hacktivation and/or a carrier unlock.

With that said, today we are releasing PwnageTool 4.0

PLEASE READ THIS ENTIRE POST CAREFULLY, THERE ARE KNOWN UPGRADE TRAPS AND DIFFERENT UPGRADE SCENARIOS THAT NEED TO BE FULLY UNDERSTOOD AND CONSIDERED BEFORE USING THESE TOOLS.

Each supported device has few different scenarios that users need to consider when performing the upgrades, you need to check below and perform the upgrade in the particular way that matches your current device state.

NB: With PwnageTool 4.0 certain devices are not supported this is because they are not supported in iOS 4.0 or they are not supported by our software.  We’re working on ways to get past these restrictions.

  • iPhone 2G  - not supported
  • iPod Touch – not supported
  • iPod Touch 3G – not supported

PwnageTool 4.0 only recognizes the official IPSWs that came out yesterday. If you had developer access to the “4.0 GM” IPSWs, do not try to use those.

iPhone 3GS

Summary: Currently, PwnageTool only works on previously jailbroken 3GS devices with the old bootrom.

  • If you have a Jailbroken iPhone 3GS with the OLD BOOTROM and you DID NOT use Spirit to jailbreak then you can create the ipsw with PwnageTool 4.0 and restore with your jailbroken recovery mode.
  • If you have an iPhone 3GS with the NEW BOOTROM this is NOT supported by PwnageTool 4.0

iPhone 3G

  • If you have a Jailbroken iPhone 3G at 3.1.2 (but not jailbroken with Spirit) then you should create the ipsw with PwnageTool 4.0 and restore from recovery mode or DFU mode.
  • If you have an out of the box iPhone 3G you should restore using a PwnageTool 4.0 ipsw using DFU mode.
  • If you have a Jailbroken 3.1.3 iPhone 3G it is very possible that this can fail from recovery mode, if this failure happens you will need to restore using DFU mode.
  • As an alternative to PwnageTool, you can use redsn0w on iPhone 3G (on both Windows and Mac) as mentioned in our last post.

IMPORTANT! Whenever you need to enter DFU mode, you will need to do so using PwnageTool.

iPod touch 2G

  • If you have an iPod touch 2G (non-MC model) that is jailbroken (but not with Spirit) then you can restore using recovery mode.
  • As an alternative to PwnageTool, you can use redsn0w on non-MC iPod Touch 2G (on both Windows and Mac) as mentioned in our last post.

Baseband Unlock

  • As you probably know by now, ultrasn0w has been updated to cover all basebands from 04.26.08 onward.  Many thanks to @sherif_hashim for finding the crashing command that the new ultrasn0w 0.93 uses!  He worked hard at finding the crash, and he kept it confidential until the right time to use it.
  • iPhone 3G and 3GS baseband unlockers (those who rely on ultrasn0w to make phone calls) should always be very wary to update their firmware, however our Ultrasn0w application will unlock all recent (including the current) 3GS and 3G baseband firmware versions.  Once you are jailbroken using PwnageTool 4.0, install ultrasn0w from Cydia and you’ll be unlocked.
  • Remember! This baseband unlock situation is rare, should you upgrade your iPhone blindly at the next iOS release please don’t expect an unlock – but for now you are OK (whatever state your baseband is in).

Please feel free to ask any questions in the comment section below.  We’ve got a bunch of expert help there, including our friendly moderators confucious and angie!

Official Bittorrent Releases

PwnageTool 4.0 Torrent  - PwnageTool_4.0.dmg.5644414.TPB.torrent

SHA1 Sum = 15bdb90ec40f1e279bb648eb7e9d90ebe07b66d2

Unofficial Mirrors

The following links are unofficial download mirrors, you download these archives at your own risk, we accept no responsibility if your computer explodes or if it becomes part of a NASA attacking botnet or even worse if your hands fall off mid-way during the use of these files. We do not check these links and we accept no responsibility with regard to the validity of the files, the other content that these links may provide or with the content that is on the third-party linked site.

Always check the files that you have downloaded against our published SHA1 hash.

We would prefer that you downloaded the official bittorrent release that is linked above, but you are welcome to try these if you really must. Mirror owners should email direct dmg download links only (no rapidshare or filesharing sites please) to blog@iphone-dev.org — please don’t place mirrors in the comments as they will be deleted.

http://apfelportal.de/host/images/dev-team/PwnageTool_4.0.dmg

United States

Turkey

Germany

How to Jailbreak iOS 4

The revolutionary new iPhone/iPod Touch operating system, iOS 4, has been successfully jailbroken using Redsn0w. Here’s how:

1. Download Redsn0w for Mac OS X or for Windows

2. Connect your device to your computer and shut it off (slide to shut down)

3. Download the corresponding iOS 4 firmware for your iDevice from the “Downloads” section of TechGeec.com

4. Open Redsn0w and browse for the firmware that you downloaded. Select “Next”

5. Select which features you’d like to be installed with the jailbreak (certain devices cannot have multitasking, homescreen wallpaper, or battery percentage so enabling those features gives that device the features)

6. Click “Next” twice and prepare to put your iDevice into DFU Mode

7. On the screen that shows you what to do to put your device in Recovery Mode:
Hold power button for 3 seconds
While still holding the power button, hold the home button for 10 seconds
While still holding the home button, release the power button and continue holding the home button for 30 seconds

8. Congratulations! Once your device reboots you should have Cydia on your home screen.

Feel free to leave a comment below stating what your favorite feature of iOS 4 is, if you enjoy jailbreaking, if you’ve had any problems, or any other sort of feedback, and please, share this post and TechGeec.com with your friends.

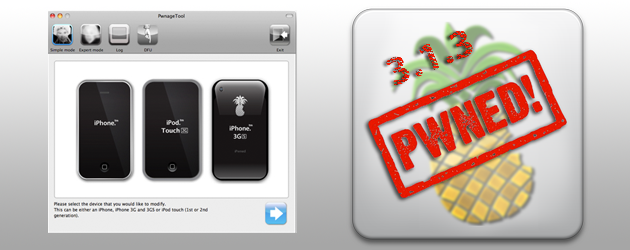
Jailbreak 3.1.3 with PwnageTool 3.1.5

Yesterday the Dev Team released the latest of PwnageTool which will allow  all iDevices with the older bootrom (i.e. not iPod touch 3G, iPod Touch 2G (MC Model), or newer iPhone 3GS owners) to create a custom jailbroken OS 3.1.3 firmware file.  This firmware file will contain the older base-band so if you have unlocked with blacksn0w you should NOT use it.  This tool is for Macs only – there is no Windows version.

If you are on a Windows machine, however, you can use the current version of Redsn0w. When it asks to browse for the firmware, browse for the
3.1.2 firmware… it works the same.

Please be sure to read the whole post by the Dev Team HERE before you go ahead and jailbreak your iDevice.

Redsn0w 0.9 Released for Mac and Windows

Well the iPhone Dev-Team has unofically released redsn0w 0.9 beta3. The reason why they haven’t offically announced it on their blog, is because it is still currently in the beta stages.

Quote (via redsn0w 0.9beta3):

What is it?

A cross-platform jailbreaking, unlocking, and customizing tool for iPhones and iPod touches. Customizations include boot logos, recovery logos, and “verbose” boot. It’s a standalone program that doesn’t use iTunes (no custom IPSWs are involved).

The download links are at the bottom of this page (but please read the whole page anyway!).

We’ve been offering redsn0w in various incarnations over the years (including poorlad’s Windows version of QuickPwn). The most recent release before this one was redsn0w 0.8, which targeted Apple firmware 3.0/3.0.1.

What devices, platforms, and FW versions are supported?

The beta supports:

  • All iPhones and iPod touches except the iPod touch 3G
  • Windows and Mac OSX (x86)
  • Apple firmware 3.0 and 3.1.2

When it’s out of beta, it will support the iPod touch 3G, PPC OSX, and Linux.

If you need a carrier unlock, redsn0w will handle iPhone 2G by itself (by installing our BootNeuter utility). For the 3G and 3GS, use Cydia after you’re jailbroken to install ultrasn0w (baseband 04.26, preferred) or blacksn0w (baseband 05.11).

How is it different from PwnageTool?

redsn0w doesn’t require a system restore like PwnageTool does (it doesn’t even use iTunes at all). On the other hand, PwnageTool can prevent your baseband from being upgraded when you upgrade your firmware, preserving your unlock. (redsn0w doesn’t touch your baseband but it doesn’t help preserve it during an upgrade either).

redsn0w works by modifying your current filesystem, so your existing baseband, data and applications should remain intact.

How is it different from blackra1n?

It differs from blackra1n because:

  • It uses our original Pwnage bootrom exploit for iPhone 2G, iPhone 3G, and iPod 1G. (Because it’s a bootrom exploit, it can’t be fixed by Apple without a new hardware release.) Note that redsn0w 0.9 does use the USB exploit for iPhone 3GS and iPod 2G running 3.1.2, but that exploit will be fixed in Apple’s next FW release.
  • It offers custom logos and verbose boot
  • It installs Cydia without needing a separate download
  • It’s not as fast :) (but redsn0w handles more variations :))

What if I have a late-model device?

If you have a late-model iPhone 3GS, or if you have an iPod touch 2G whose serial number begins with “MC”, you can use redsn0w to jailbreak but you are currently restricted to “tethered” rebooting. That means you need to connect your device to a computer to complete the boot after a reset. Also, these devices cannot have custom logos.

redsn0w will ask you whether or not you fit in this category when used with the iPhone 3GS or iPod touch 2G. If you have a late-model device and don’t give redsn0w the correct answer, you will likely need to do a system restore to recover from the mistake.

To do a tethered boot after your late-model device resets for some reason, either run redsn0w again and select “Just boot tethered right now”, or run blackra1n.

What if I’m already jailbroken?

If you’re already jailbroken (by whatever means), redsn0w can still be used to change your boot logos, revert back to the stock logos, or switch verbose booting on and off. By selecting “Already Pwned” you can bypass the steps normally needed to enter the jailbroken state.

How long should it take

You should see a picture of a drive (“Downloading Jailbreak Data”) within 30 seconds of launching the jailbreak (after you’ve made your custom selections). It should then reboot and you should see a running pwnapple while the process is underway. It should finish within a minute or two after that, and will reboot on its own.

Is it safe?

The Windows version has been tested by small groups of volunteers on IRC and our blog since mid-January. That being said, this is still a beta and if things go wrong you may have to do a system restore…so make sure your data and pictures are synced before trying the beta.

Beta feedback

redsn0w is in beta until we get iPod Touch 3G, PPC OSX, and Linux support added. In the meantime, please send any feedback to MuscleNerd (either gmail or iphone-dev.org), or tweet with a #redsn0w tag. Please detail your device, OS, and any problem you find.

Download links

I was able to succesfully jailbreak my second generation iPod Touch using Redsn0w 0.9 beta3 and I highly reccommend it over Sn0wbreeze as Sn0wbreeze didn’t work for me whatsoever. And my feature included in 0.9 beta3, is that it offers verbose boot. Verbose boot is a boot function that shows the processes the iDevice must go through in order to boot. So instead of displaying the regular Apple logo, it displays the current processes. Here’s what it looks like:

Have fun jailbreaking your iDevice running 3.1.2! To visit the download page, click HERE.

How to Jailbreak 3.0.1 Firmware

Courtesy of  QuickPWN.com:

The iPhone 3.0.1 update was recently released. If you want to jailbreak any iPhone running on  iPhone OS 3.0.1, you must use redsn0w 0.8. Do not update to 3.0.1 if you are using an iPod Touch, there is no need to. This post will show a step-by-step tutorial on how to jailbreak iPhone 3.0.1 with redsn0w.

Note:

  1. redsn0w only recognizes iPhone 3.0 firmware (not 3.0.1 yet!), although you are running firmware 3.0.1 you must still download iPhone OS 3.0 firmware for your device.
  2. The recent iPhone 3.0.1 update does not fix the iPhone 3GS hole, so it’s safe for iPhone 3GS users to update. If you downloaded a purplera1nday file or your iBec or iBSS for iPhone 3GS you don’t need to redownload it because it’s identical in this update.

First you must download redsn0w for Windows, Mac, or Linux from here.

redsn0w 0.8 works for Phone 3.0.1, iPhone 3G 3.0.1, iPhone 3GS 3.0.1, iPod Touch 3.0, and iPod Touch 2G 3.0.

1. Download the iPhone OS 3.0 IPSW file for your device and save it to your desktop. Here are the file names for each device, make sure you have the right one:

  • iPhone 2G – filename: iPhone1,1_3.0_7A341_Restore.ipsw [download link]
  • iPhone 3G – filename: iPhone1,2_3.0_7A341_Restore.ipsw [download link]
  • iPhone 3GS – filename: iPhone2,1_3.0_7A341_Restore.ipsw [download link]

2. Open the redsn0w 0.8 application to jailbreak iPhone 3.0.1.

3. Click the Browse button.

redsn0w browse

4. Locate your device’s IPSW file that you downloaded in step 1 and click Open.

Browse for IPSW

5. The redsn0w window will have the “IPSW successfully identified” message. Click the Next button to continue.

IPSW Successfully Identified

6. redsn0w will ask you to “Please select which options you would like to have“. Make sure the Install Cydia box has a check mark and then click Next.

redsn0w select options

7. redsn0w will ask you to make sure your device is both OFF and PLUGGED IN to your computer. Make sure you plug in your device in to your computer and then turn it off. Click Next once you have done this.

redsn0w - Make sure your devices is OFF and PLUGGED IN

8. redsn0w will now ask you to connect your device in DFU mode, you must do this properly to jailbreak iPhone 3.0.1.

  1. Hold down the Power button for 3 seconds
  2. Without releasing the Power button, also hold down the Home (bottom center button) for 10 seconds
  3. Without releasing the Home button, release the Power button BUT KEEP holding the Home button for 30 seconds
  • If you don’t do this properly you will get a DFU Mode Failed message and you’ll have to go back to step one.

redsn0w DFU Mode

9. Once your device has successfully entered DFU Mode, redsn0w will show the following message: “Please wait while your device is being jailbroken. Waiting for reboot.” Your device should reboot after this. If redsn0w is stuck on Waiting to Reboot, unplug your USB cable quickly and plug it back in. The jailbreaking process should continue after tha.

10. Once your device has rebooted redsn0w will start uploading the RAMDisk and kernel.

11. After everything has been successfully uploaded to your device, redsn0w will have; the “Done!” message. Your device will now reboot and you should see the Cydia app on your SpringBoard. Your iPhone is now jailbroken!