Tag Archives: tutorial

revo uninstaller

Completely Uninstall Programs on Windows

Revo Uninstaller, developed by VS Revo Group, is a tool that allows you to completely uninstall a program from Windows. Often when uninstalling programs through the typical uninstaller, many registry files and directories are left behind. Over time these left over and useless files bog down your computer. By using a tool like Revo Uninstaller, it will uninstall the program like normal and then scan the computer for any additional files that were not removed. It allows you to select which files to keep and which to delete.

You can purchase the full version of Revo Uninstaller but I recommend just downloading the free version. It will still scan for leftovers after the standard uninstall, it includes eight additional cleaning tools, and free tech support is also included. There’s some nice features that come packed with the Pro version but nothing that I feel is worth the $20 – $40 price tag.

You can download Revo Uninstaller by clicking HERE.
display recorder

Display Recorder – Record iPhone, iPod touch, iPad Screen in HD with Audio

Display Recorder, developed by Ryan Petrich and available for $4.99 from the Cydia Store, allows you to record your iPhone, iPod touch, or iPad’s display. This app is terrific if you want to record your device’s display for a YouTube video, send a video of your recorded display to a friend, or record a video and download it to your computer so that you can edit it, such as what we use it for.

Display Recorder records directly to H.264 or MJPG/AVI for amazing HD quality, optionally records microphone audio, features on-device YouTube uploading, adjustable framerate and quality settings, hardware accelerated video encoding (meaning new devices will encode recordings faster than older devices), and includes a web site to manage your recordings. Simply enter the web server address (in the format of http://IPaddress:port) that’s displayed at the bottom of the app into your web browser.

Steps (once your iPhone is jailbroken):
1. Open Cydia
2. Search for “Display Recorder”
3. Download the app.
4. Congratulations! Display Recorder should now be installed on your device.

Question:
What will you do with your screen recordings? If you upload them to YouTube, send us the link!

iPhone Home Button

How to Recalibrate (Refresh) iPhone, iPod touch, or iPad Home Button

After an iPhone, iPod touch, or iPad has been used for some time, the home button may begin to seem unresponsive or slow. While this may be due to a hardware issue (the device may have been dropped, damaging internal hardware), it’s worth a shot to recalibrate the device’s home button.

To recalibrate the home button, follow these steps:

1. Open a pre-installed app (e.g., Stocks, Calendar, Weather, Calendar, etc.).
2. Hold down the power button until the “Slide to Power Off” option appears.
3. Hold down the home button until the application quits.

This may or may not solve your home button’s issue(s) but there is no harm in trying. If you try this tip make sure to leave us a comment telling us whether or not it made a difference for you.

txt to computer

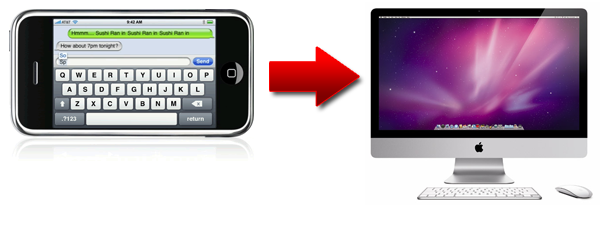
How to Transfer/Backup Text Messages from iPhone to Computer

For 30% off of your DigiDNA purchase, download DiskAid from http://www.digidna.net/techgeec.

To download DiskAid click HERE.

ipod nano 6g hack

How to Hack iPod Nano 6G

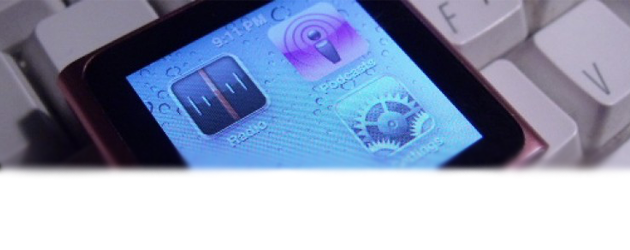
This tutorial enables you to remove application icons from the iPod Nano 6G’s SpringBoard and insert blank spaces into the those locations. The iPod Nano in this tutorial is running the current 1.0 firmware and is Windows-formated. This will not work with a Mac-formatted Nano. It’s fairly basic and simple, but shows that booting with a user modified file is possible and is a nice proof of concept and is the first small ‘hack’ as such for the new iPod Nano. Before doing this, read the iPod Nano hacking primer, which James Whelton, the hacker, wrote here: http://nanohack.me/?p=33

Tutorial (via NanoHack.me)

  1. Make sure “Enable disk use” is ticked in iTunes when the Nano is plugged in.
  2. Go to My Computer and then into the NanoEnable hidden folders and go into theiPod_Control, then into Device.
  3. Make a backup of IconState.plist (save it to your desktop or something) and then proceed to open the original with Notepad or any text editor, here is what you’ll see this:
  4. For this tutorial I removed the SBPhotos part of the corresponding string and deleted the SBAlbums and SBGenres. (Note: you aren’t actually deleting the apps, simply removing their visibility from the system).
  5. Save this file.
  6. SyncTug it: hold down the minus volume button and lock button at the same time and as soon as it begins to reboot (screen flashes black for a moment),  unplug the iPod cable from it.
  7. Watch it boot and show  that the Photos and Genres app are missing and a space before the Settings app.

Its that simple and the same ‘SyncTug’ technique can be used on the iPodSettings.xml file to change stuff like wallpaper and whatnot (so far just playing, I’ve altered a few setting with it, have not looked greatly into it). Play around with it and post your findings. In the case you muck something up, just connect it your computer and replace the IconState.plistwith the backup one we made earlier and SyncTug. Failing that, simply restore in iTunes. Something to note also is that if you attempt to press down on an icon and move it, the iPod nano will do a quick reset as it can’t understand why the hell theres a blankspace. The iPod will also sync fine in iTunes and retain this hack.

How to Unlock the iPhone 4 for Use with Other Carriers (T-Mobile)

Unlocking an iPhone allows one to use it with an unsupported wireless carrier, for example, T-Mobile, in the U.S. The iPhone Dev-Team has released an unlock for the iPhone 4 using the baseband 01.59. If you don’t know what baseband your iPhone is currently on, you can use a program by iH8sn0w, called f0recast for both Mac and PC. You can download it HERE.

This unlock is incredibly simple and fast. Here’s the steps:

1. Jailbreak your iPhone 4: http://www.youtube.com/watch?v=Cqy0sPoN8Z8
2. Open Cydia>Manage>Sources>Edit>Add
3. Add the source: http://repo666.ultrasn0w.com
4. Remove SIM card if haven’t already
5. Search for and install ultrasn0w
6. Reboot iPhone

If no signal is found, go to Settings and turn on Airplane Mode, then turn it off. If you still have no signal, reboot the iPhone. That’s it! Your iPhone 4 should now be successfully unlocked and using either T-Mobile or another unsupported carrier! Follow @TechGeec on Twitter for updates.

Jailbreak iPhone 4, iPhone 3GS, iPhone 3G, iPod touch 1G, iPod touch 2G, iPod touch 3G, and iPad on iOS 4, iOS 4.0.1, and iPad iOS 3.21

JailbreakMe 2.0 has now officially been released. This the new jailbreak for iPhone 4, iPhone 3GS, iPhone 3G, iPod touch 1G, iPod touch 2G, iPod touch 3G, and iPad on iOS 4, iOS 4.0.1, and iPad iOS 3.21 released by trusted member of the iPhone dev-team, Comex.

If you are planning to jailbreak, make sure you sync with iTunes first and create a backup just in case something happens to go wrong. Turn on your iPhone 4, iPhone 3GS, iPhone 3G, or iPad and open Safari. Then go to JailbreakMe.com. Slide “Slide to Jailbreak” bar to start the jailbreak process, and you will be given further instructions depending on what firmware your device is on.

This is currently the newest and easiest jailbreak for the iPhone and iPad. Also, many of you will be happy to know that jailbreaking is now 100% legal, but don’t forget that you will lose your warranty. Follow @TechGeec on Twitter for future updates.

iOS 4 Jailbreak: Q&A

There has been so much confusion lately on which devices can be jailbroken, what programs to use, etc. Hopefully the video below will answer your questions. If you still have questions that weren’t answered in the video, leave a comment and your question will be answered ASAP.

Jailbreak Released for iPhone 3GS (Old Bootrom)

Quote (via iPhone Dev-Team Blog)

PwnageTool 4.0 Release Info

On Monday, Apple released firmware 4.0 for the iPhone and iPod touch devices.  This of course was a major upgrade.

As advised, you shouldn’t have upgraded your devices if you have previously relied on our tools for hacktivation and/or a carrier unlock.

With that said, today we are releasing PwnageTool 4.0

PLEASE READ THIS ENTIRE POST CAREFULLY, THERE ARE KNOWN UPGRADE TRAPS AND DIFFERENT UPGRADE SCENARIOS THAT NEED TO BE FULLY UNDERSTOOD AND CONSIDERED BEFORE USING THESE TOOLS.

Each supported device has few different scenarios that users need to consider when performing the upgrades, you need to check below and perform the upgrade in the particular way that matches your current device state.

NB: With PwnageTool 4.0 certain devices are not supported this is because they are not supported in iOS 4.0 or they are not supported by our software.  We’re working on ways to get past these restrictions.

  • iPhone 2G  - not supported
  • iPod Touch – not supported
  • iPod Touch 3G – not supported

PwnageTool 4.0 only recognizes the official IPSWs that came out yesterday. If you had developer access to the “4.0 GM” IPSWs, do not try to use those.

iPhone 3GS

Summary: Currently, PwnageTool only works on previously jailbroken 3GS devices with the old bootrom.

  • If you have a Jailbroken iPhone 3GS with the OLD BOOTROM and you DID NOT use Spirit to jailbreak then you can create the ipsw with PwnageTool 4.0 and restore with your jailbroken recovery mode.
  • If you have an iPhone 3GS with the NEW BOOTROM this is NOT supported by PwnageTool 4.0

iPhone 3G

  • If you have a Jailbroken iPhone 3G at 3.1.2 (but not jailbroken with Spirit) then you should create the ipsw with PwnageTool 4.0 and restore from recovery mode or DFU mode.
  • If you have an out of the box iPhone 3G you should restore using a PwnageTool 4.0 ipsw using DFU mode.
  • If you have a Jailbroken 3.1.3 iPhone 3G it is very possible that this can fail from recovery mode, if this failure happens you will need to restore using DFU mode.
  • As an alternative to PwnageTool, you can use redsn0w on iPhone 3G (on both Windows and Mac) as mentioned in our last post.

IMPORTANT! Whenever you need to enter DFU mode, you will need to do so using PwnageTool.

iPod touch 2G

  • If you have an iPod touch 2G (non-MC model) that is jailbroken (but not with Spirit) then you can restore using recovery mode.
  • As an alternative to PwnageTool, you can use redsn0w on non-MC iPod Touch 2G (on both Windows and Mac) as mentioned in our last post.

Baseband Unlock

  • As you probably know by now, ultrasn0w has been updated to cover all basebands from 04.26.08 onward.  Many thanks to @sherif_hashim for finding the crashing command that the new ultrasn0w 0.93 uses!  He worked hard at finding the crash, and he kept it confidential until the right time to use it.
  • iPhone 3G and 3GS baseband unlockers (those who rely on ultrasn0w to make phone calls) should always be very wary to update their firmware, however our Ultrasn0w application will unlock all recent (including the current) 3GS and 3G baseband firmware versions.  Once you are jailbroken using PwnageTool 4.0, install ultrasn0w from Cydia and you’ll be unlocked.
  • Remember! This baseband unlock situation is rare, should you upgrade your iPhone blindly at the next iOS release please don’t expect an unlock – but for now you are OK (whatever state your baseband is in).

Please feel free to ask any questions in the comment section below.  We’ve got a bunch of expert help there, including our friendly moderators confucious and angie!

Official Bittorrent Releases

PwnageTool 4.0 Torrent  - PwnageTool_4.0.dmg.5644414.TPB.torrent

SHA1 Sum = 15bdb90ec40f1e279bb648eb7e9d90ebe07b66d2

Unofficial Mirrors

The following links are unofficial download mirrors, you download these archives at your own risk, we accept no responsibility if your computer explodes or if it becomes part of a NASA attacking botnet or even worse if your hands fall off mid-way during the use of these files. We do not check these links and we accept no responsibility with regard to the validity of the files, the other content that these links may provide or with the content that is on the third-party linked site.

Always check the files that you have downloaded against our published SHA1 hash.

We would prefer that you downloaded the official bittorrent release that is linked above, but you are welcome to try these if you really must. Mirror owners should email direct dmg download links only (no rapidshare or filesharing sites please) to blog@iphone-dev.org — please don’t place mirrors in the comments as they will be deleted.

http://apfelportal.de/host/images/dev-team/PwnageTool_4.0.dmg

United States

Turkey

Germany

How to Jailbreak iOS 4

The revolutionary new iPhone/iPod Touch operating system, iOS 4, has been successfully jailbroken using Redsn0w. Here’s how:

1. Download Redsn0w for Mac OS X or for Windows

2. Connect your device to your computer and shut it off (slide to shut down)

3. Download the corresponding iOS 4 firmware for your iDevice from the “Downloads” section of TechGeec.com

4. Open Redsn0w and browse for the firmware that you downloaded. Select “Next”

5. Select which features you’d like to be installed with the jailbreak (certain devices cannot have multitasking, homescreen wallpaper, or battery percentage so enabling those features gives that device the features)

6. Click “Next” twice and prepare to put your iDevice into DFU Mode

7. On the screen that shows you what to do to put your device in Recovery Mode:
Hold power button for 3 seconds
While still holding the power button, hold the home button for 10 seconds
While still holding the home button, release the power button and continue holding the home button for 30 seconds

8. Congratulations! Once your device reboots you should have Cydia on your home screen.

Feel free to leave a comment below stating what your favorite feature of iOS 4 is, if you enjoy jailbreaking, if you’ve had any problems, or any other sort of feedback, and please, share this post and TechGeec.com with your friends.